Hey bestie!
Welcome to another edition of the Creator Girlie Support Group (a new section here on Substack). Don’t worry; we’re still doing the regular Spoiled Girlie Support Group newsletters. I’ve been getting so many questions on how I create content so we’re doing a series on de-mystifying content creation—aka the Creator Girlie Support Group.
Now back to the topic, I got this question recently and I have so much to say about this!
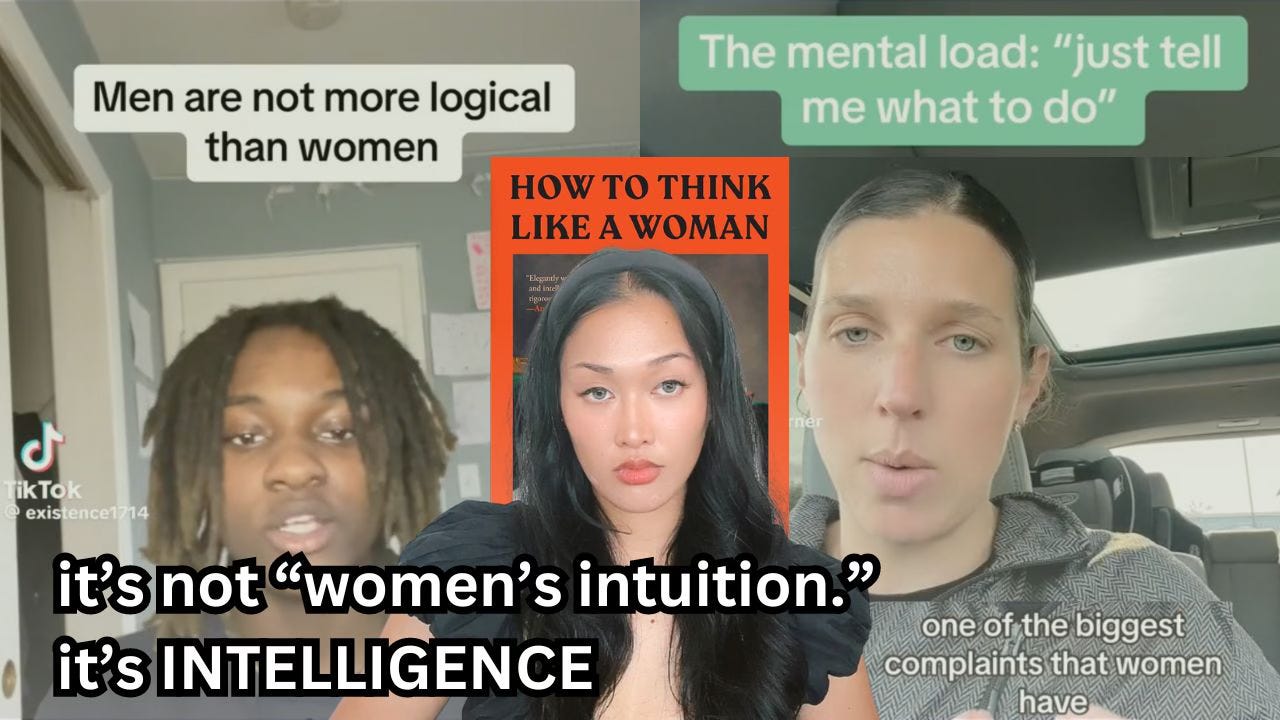
First, I want to emphasize how important the thumbnail is. You work so hard on your content and it’s such a shame if it’s the thumbnail that drags your performance down.
On Youtube, people 100% judge the book by its cover. Even if your video is amazing and really well done, if your thumbnail sucks, it’s over… no one is clicking. I’ve had so many of these underperforming thumbnails that over time, I’ve come up with a system to make sure I’m giving my videos the best chance when I hit “publish.”
So here’s exactly what I do:
Pre-filming
Even before I film, when I’m just writing the first draft of the script, I already think of a 1-4 word phrase that will go on my thumbnail. It can’t be a lot of words because people need to be able read it when it’s formatted the smallest. So 1-4 words max. I create 2-3 versions of these words and keep them in mind while I write the episode. Sometimes, I completely change the words when I’m done so the words fully embody the direction of the episode.
The last thing you want to do is create a “click-bait” thumbnail. You may get the clicks and the views but if your video under-delivers or doesn’t align with your thumbnail, your retention suffers. So you really want to make sure your thumbnail represents your episode.
You also have to keep in mind that the best thumbnails look like the first frame of your video. This reinforces to the viewer that they clicked on the right video and the rest of your video will deliver on what you promised them with the title and thumbnail. If you’re doing a talking head video, it helps to say the words on the thumbnail or the words on the title in the first few seconds of the video—this helps the viewer relax and keep watching your video.
Filming
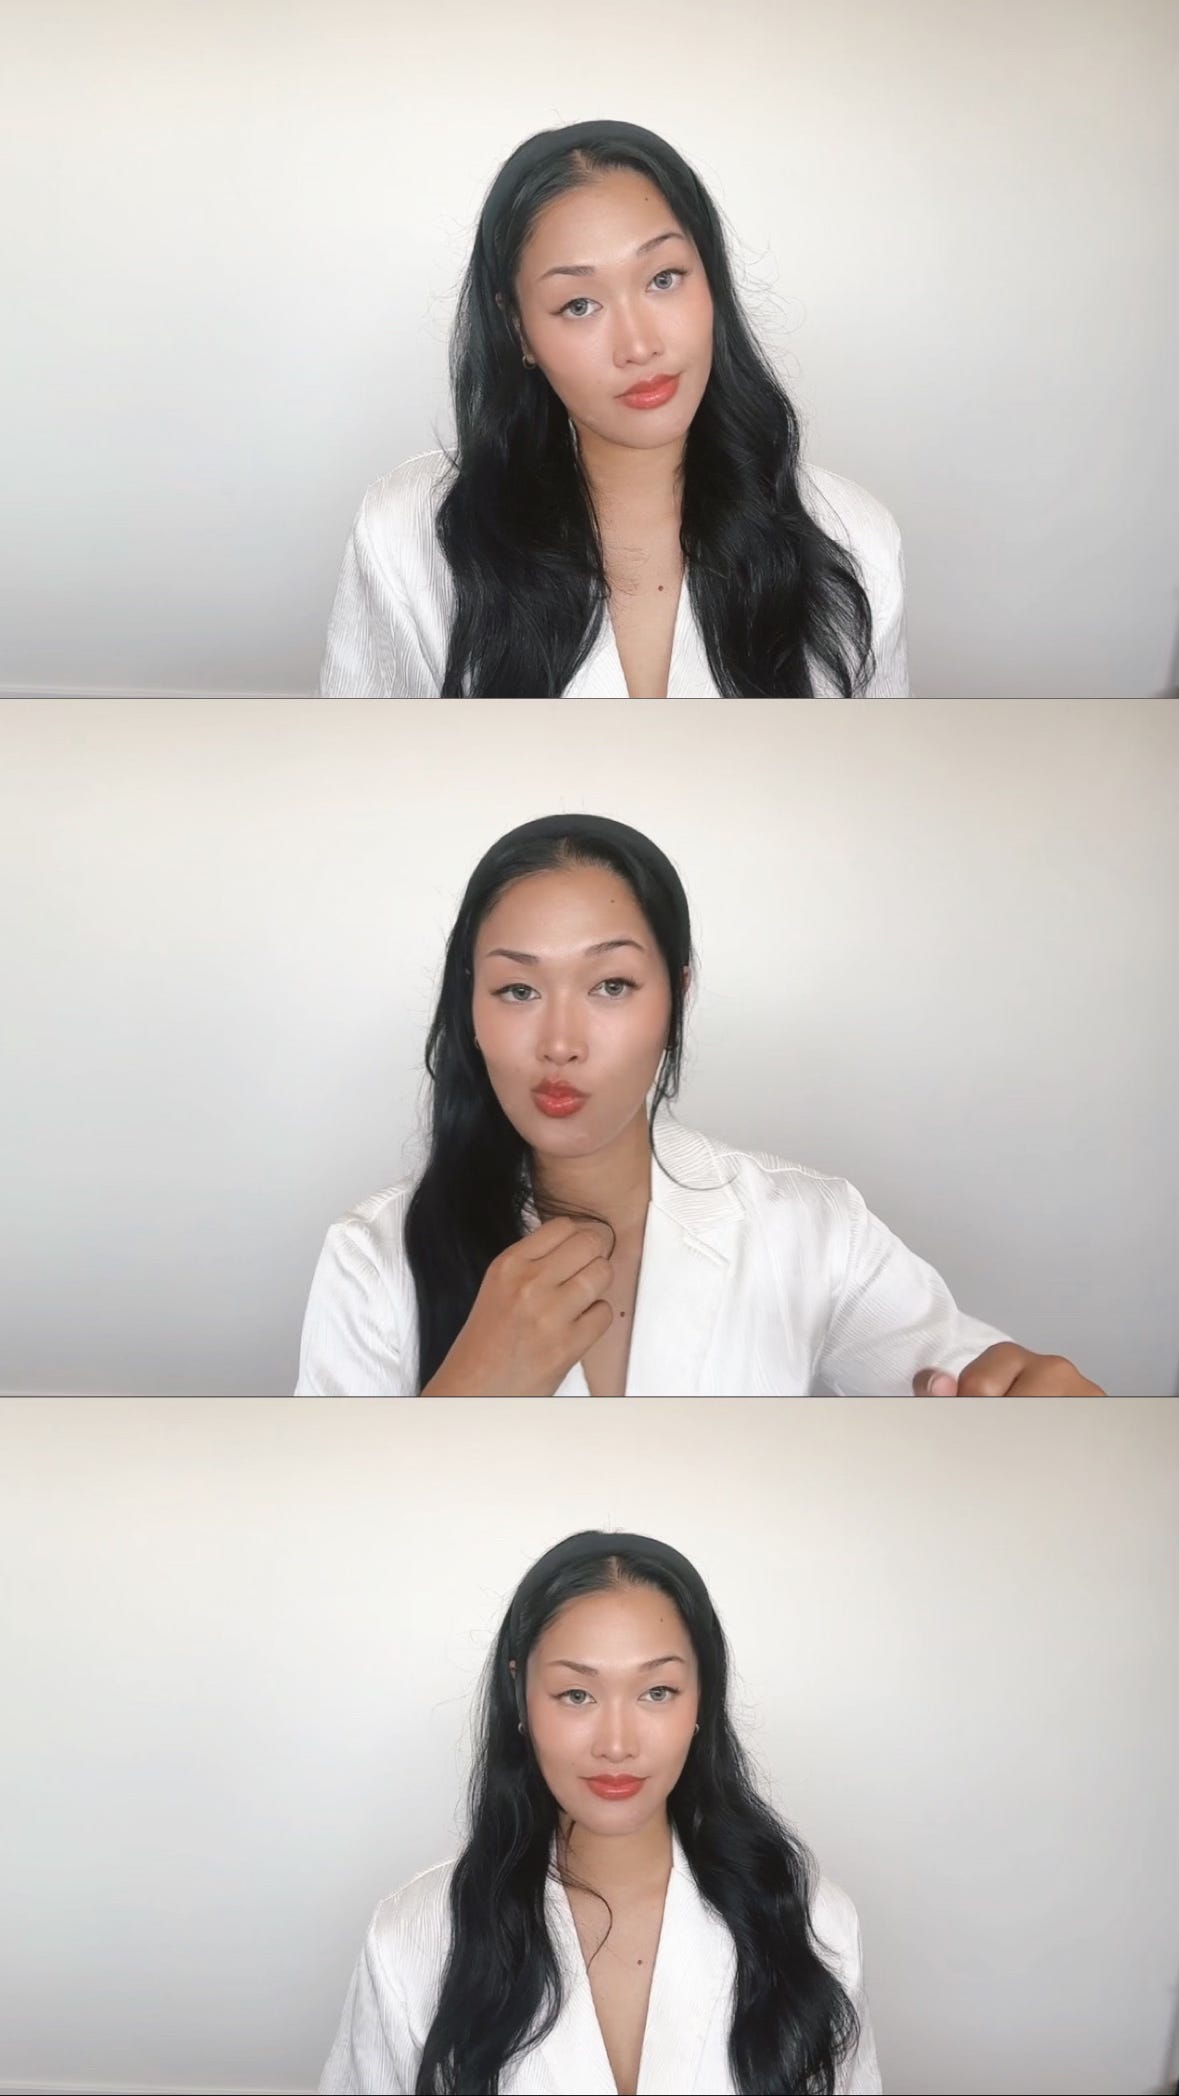
Take a few seconds before your main filming session to make a few poses. I like to keep the camera rolling and just screenshot later. Make a few different faces (smiling, smug, surprised, mid-speech). Take screenshots of your video and pick the face that matches the vibe of your video.
After your main filming session, take a few more poses just to be sure. By this time, you’ll have a better grasp of the vibe of your video so you can make those reactions if you didn’t make them before filming.
I chose the third pic for my thumbnail for this episode.
Creating the Thumbnail
First, there is no surefire way to create THE BEST thumbnail. The best thing we can aim for is to make a thumbnail that doesn’t suck. There is no one formula, but here’s what I’ve been doing for mine:
Research
For every episode, I check Youtube if anyone has done a video on the topic yet. If they have, I screenshot their thumbnails and create a moodboard on my Notion (I love Notion sm can you tell? not spons but open to be sponsed🤣). I also have on my moodboard screenshots of thumbnails of other people in my “niche.” Right now, my vibe is video essays so I’m emulating video essay creators so people know they’re getting a video essay when they click on my videos.
Canva
I first started editing my thumbnails on Procreate on my iPad and I had these handwritten elements but I think that vibe works better for lifestyle creators. Before I got Canva Pro, I was creating thumbnails on Photoshop but honestly, I’ve fully made the switch to Canva. It’s just less complicated and I can see my past thumbnails in the same interface so I can check if my new thumbnails fit my brand aesthetic.
Fitting your brand aesthetic is very important BTW so people know it’s your video at first glance. This is probably less important when you’re just beginning but as you create more videos, it helps to have the same “look” so you establish your brand identity.
Definitely upgrade to Canva Pro so you can use the “BG Remover” tool so you can remove the background on your headshot so you can be in the foreground of your thumbnail. For some reason, thumbnails with faces do better than without. (According to YouTube analytics, thumbnails with human faces tend to perform better because they create an emotional connection with the viewer.)
Some design considerations you should be aware of:
Size: 1280x720 pixels
Bold fonts: Use bold and simple fonts so your text is easy to read even when the thumbnail is tiny.
High contrast: If your background is light, use dark text, and vice versa.
Shadows and outlines: Canva lets you add text shadows or outlines, making it easier for your text to jump off the thumbnail.
Colors: use colors that match your brand. Keep your brand hex codes handy so you can type them into the color picker.
Logos or watermarks: you can add a tiny logo in the corner of your thumbnail so it looks official
Keep it clean: try not to make it too cluttered (unless that’s the vibe). Zoom out and check your thumbnail if it’s still eye-catching even at such a small size.
Create 2-3 thumbnails!
Create 2-3 iterations of your thumbnail. Youtube added a “test” feature for youtube videos so you can test which thumbnail works the best. If you’re convinced one thumbnail will work the best, go for it! But if you’re caught between 2 or 3, do the test then stop it when you find a clear winner.
Some viewers have actually picked up on this and if you were one of them, now you know why the thumbnail kept changing 😉
Closing Thoughts
And there you have it!
Youtube thumbnails de-mystified. It sounds like a lot, but once you have your system down and a few thumbnails done on Canva, you can follow your previous templates and the thumbnail design process will be much easier.
If you enjoyed this mini-tutorial, I created a few hours worth of video tutorials on The Business of Content Creation which details my exact creator journey on how I took Manifestelle into a full-blown content creation business. If you thought this was detailed, be prepared for more deets!
Use code CREATOR100 to get $100 off*


